Ever wanted to know how to make your own layouts? Well, you've come to the right place. I will show you how to write your own HTML layout, and then how to put it into your profile.
Step 1
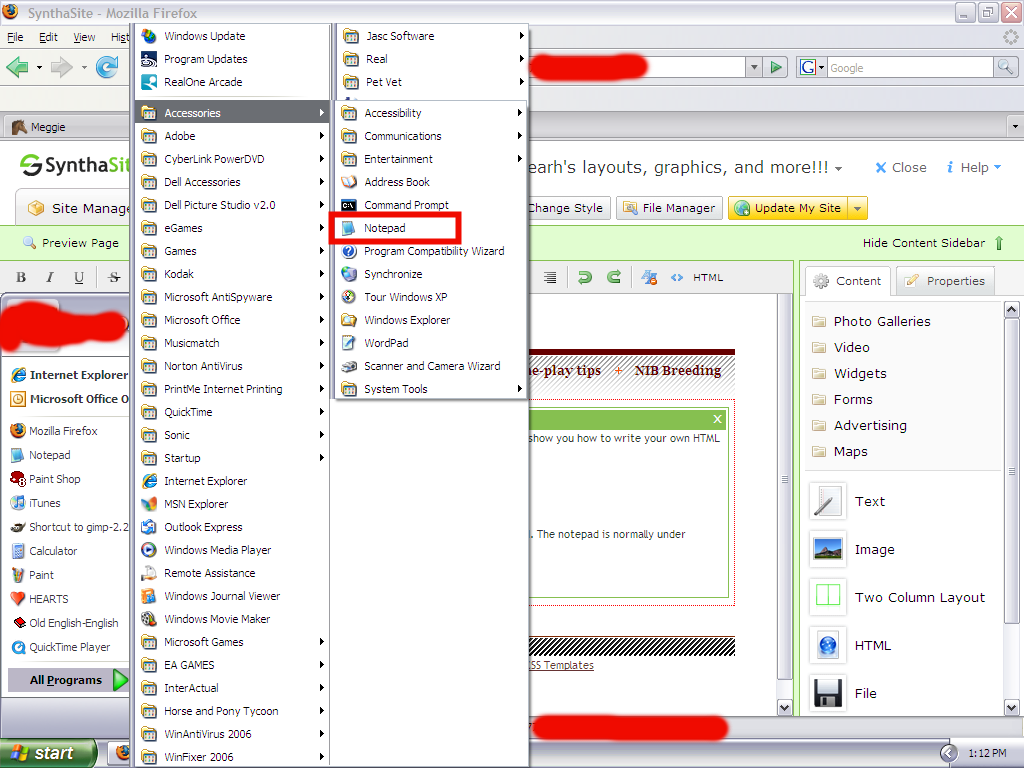
Open a new text document.
Step 1
Open a new text document.
- I don't suggest word....its a pain in the butt. On windows computers use the notepad. The notepad is normally under accessories.
Then begin by typing
<table>
</table>
Now add rows (add as many as you want, I'm going to do 4)
<table>
<tr>
</tr>
<tr>
</tr>
<tr>
</tr>
<tr>
</tr>
</table>
Always be sure to close each code before moving on to the next code.
Now we need to add columns (Again, add as many columns as you want, just keep track. Im going to add 4 columns)
<table>
<tr>
<td>
</td>
<td>
</td>
<td>
</td>
<td>
</td>
</tr>
<tr>
<td>
</td>
<td>
</td>
<td>
</td>
<td>
</td>
</tr>
<tr>
<td>
</td>
<td>
</td>
<td>
</td>
<td>
</td>
</tr>
<tr>
<td>
</td>
<td>
</td>
<td>
</td>
<td>
</td>
</tr>
</table>
OK, now, the first row will be our banner, so we need to remove three columns and put the colspan code into the first column.
I have also decided that I want the bottom row to be one celled, so we will place the same code there, as well as remove the three extra columns.
<table>
<tr>
<td colspan=4>
</td>
</tr>
<tr>
<td>
</td>
<td>
</td>
<td>
</td>
<td>
</td>
</tr>
<tr>
<td>
</td>
<td>
</td>
<td>
</td>
<td>
</td>
</tr>
<tr>
<td colspan=4>
</td>
</tr>
</table>
Now for the banner. Take your banner code (url only) and place it next to the colspan code, like so:
Also add the height of the banner.
<table>
<tr>
<td colspan=4 background="url goes here" height=500>
</td>
</tr>
<tr>
<td>
</td>
<td>
</td>
<td>
</td>
<td>
</td>
</tr>
<tr>
<td>
</td>
<td>
</td>
<td>
</td>
<td>
</td>
</tr>
<tr>
<td colspan=4>
</td>
</tr>
</table>
Now take your code and space all the rows, like so:
This helps to keep your HTML organized so that you dont forget a row later on.
<table>
<tr>
<td colspan=4 background="url goes here" height=500>
</td>
</tr>
<tr>
<td>
</td>
<td>
</td>
<td>
</td>
<td>
</td>
</tr>
<tr>
<td>
</td>
<td>
</td>
<td>
</td>
<td>
</td>
</tr>
<tr>
<td colspan=4>
</td>
</tr>
</table>
Now to define the way the cells are expanded (AKA, Scrolling or expandable tables) The scrollbox code is: <div style="border: 0px none ; overflow: auto; float: left; margin-left: 10px; margin-right: 5px; width: 325px; height: 320px;">text here</div> (Modify height, width, and margins however you want.)
<table>
<tr>
<td colspan=4 background="url goes here" height=500>
</td>
</tr>
<tr>
<td>
<div style="border: 0px none ; overflow: auto; float: left; margin-left: 10px; margin-right: 5px; width: 325px; height: 320px;">text here
</div>
</td>
<td>
<div style="border: 0px none ; overflow: auto; float: left; margin-left: 10px; margin-right: 5px; width: 325px; height: 320px;">text here
</div>
</td>
<td>
<div style="border: 0px none ; overflow: auto; float: left; margin-left: 10px; margin-right: 5px; width: 325px; height: 320px;">text here
</div>
</td>
<td>
<div style="border: 0px none ; overflow: auto; float: left; margin-left: 10px; margin-right: 5px; width: 325px; height: 320px;">text here
</div>
</td>
</tr>
<tr>
<td colspan=4>text here
</td>
</tr>
</table>
Now lets define the width of the entire table and then the width of the columns.
Make sure the columns add up to the total amount. You can also use %, but its harder to make the scrolltables work.
With the scrolltables, add the left and right margins and subtract them from the total column width. that is what you place in the "div" tag.
<table width=800>
<tr>
<td colspan=4 background="url goes here" height=500>
</td>
</tr>
<tr>
<td width=200>
<div style="border: 0px none ; overflow: auto; float: left; margin-left: 10px; margin-right: 5px; width: 185px; height: 320px;">text here
</div>
</td>
<td width=200>
<div style="border: 0px none ; overflow: auto; float: left; margin-left: 10px; margin-right: 5px; width: 185px; height: 320px;">text here
</div>
</td>
<td width=200>
<div style="border: 0px none ; overflow: auto; float: left; margin-left: 10px; margin-right: 5px; width: 185px; height: 320px;">text here
</div>
</td>
<td width=200>
<div style="border: 0px none ; overflow: auto; float: left; margin-left: 10px; margin-right: 5px; width: 185px; height: 320px;">text here
</div>
</td>
</tr>
<tr>
<td colspan=4>text here
</td>
</tr>
</table>
Now lets define the rest of the table and the bottom cell. Lets also define the color of each cell.
table align-->tells you where the table will be on the page
table bgcolor--> the background of the entire table
table border--> how many pixels will the border be (you can put 0 to not have a border)
table bordercolor--> The color of your border
table cellpadding--> sets the amount of space (both horizontal and vertical) between the cell wall and the contents
table cellspacing--> sets the amount of space between the cells of a table.
<table align=center width=800 bgcolor=#FFFFFF border=2 bordercolor=#000000 cellpadding=3 cellspacing=3>
<tr>
<td colspan=4 background="url goes here" height=500>
</td>
</tr>
<tr>
<td width=200 bgcolor=#000000>
<div style="border: 0px none ; overflow: auto; float: left; margin-left: 10px; margin-right: 5px; width: 185px; height: 320px;">text here
</div>
</td>
<td width=200 bgcolor=#404040>
<div style="border: 0px none ; overflow: auto; float: left; margin-left: 10px; margin-right: 5px; width: 185px; height: 320px;">text here
</div>
</td>
<td width=200 bgcolor=#C0C0C0>
<div style="border: 0px none ; overflow: auto; float: left; margin-left: 10px; margin-right: 5px; width: 185px; height: 320px;">text here
</div>
</td>
<td width=200 bgcolor=#ffffff>
<div style="border: 0px none ; overflow: auto; float: left; margin-left: 10px; margin-right: 5px; width: 185px; height: 320px;">text here
</div>
</td>
</tr>
<tr>
<td colspan=4 width=800 bgcolor=#808080>text here
</td>
</tr>
</table>
And that completes the basic layout.
If you have any questions, please PM me on Howrse.
Now go to your profile on Howrse, click on "HTML mode", and copy-paste the code you have created.
NOTE: Always edit text in Normal mode. Howrse will add the font HTML. I repeat: ALWAYS EDIT THE TEXT IN NORMAL MODE!!!
<table>
</table>
Now add rows (add as many as you want, I'm going to do 4)
<table>
<tr>
</tr>
<tr>
</tr>
<tr>
</tr>
<tr>
</tr>
</table>
Always be sure to close each code before moving on to the next code.
Now we need to add columns (Again, add as many columns as you want, just keep track. Im going to add 4 columns)
<table>
<tr>
<td>
</td>
<td>
</td>
<td>
</td>
<td>
</td>
</tr>
<tr>
<td>
</td>
<td>
</td>
<td>
</td>
<td>
</td>
</tr>
<tr>
<td>
</td>
<td>
</td>
<td>
</td>
<td>
</td>
</tr>
<tr>
<td>
</td>
<td>
</td>
<td>
</td>
<td>
</td>
</tr>
</table>
OK, now, the first row will be our banner, so we need to remove three columns and put the colspan code into the first column.
I have also decided that I want the bottom row to be one celled, so we will place the same code there, as well as remove the three extra columns.
<table>
<tr>
<td colspan=4>
</td>
</tr>
<tr>
<td>
</td>
<td>
</td>
<td>
</td>
<td>
</td>
</tr>
<tr>
<td>
</td>
<td>
</td>
<td>
</td>
<td>
</td>
</tr>
<tr>
<td colspan=4>
</td>
</tr>
</table>
Now for the banner. Take your banner code (url only) and place it next to the colspan code, like so:
Also add the height of the banner.
<table>
<tr>
<td colspan=4 background="url goes here" height=500>
</td>
</tr>
<tr>
<td>
</td>
<td>
</td>
<td>
</td>
<td>
</td>
</tr>
<tr>
<td>
</td>
<td>
</td>
<td>
</td>
<td>
</td>
</tr>
<tr>
<td colspan=4>
</td>
</tr>
</table>
Now take your code and space all the rows, like so:
This helps to keep your HTML organized so that you dont forget a row later on.
<table>
<tr>
<td colspan=4 background="url goes here" height=500>
</td>
</tr>
<tr>
<td>
</td>
<td>
</td>
<td>
</td>
<td>
</td>
</tr>
<tr>
<td>
</td>
<td>
</td>
<td>
</td>
<td>
</td>
</tr>
<tr>
<td colspan=4>
</td>
</tr>
</table>
Now to define the way the cells are expanded (AKA, Scrolling or expandable tables) The scrollbox code is: <div style="border: 0px none ; overflow: auto; float: left; margin-left: 10px; margin-right: 5px; width: 325px; height: 320px;">text here</div> (Modify height, width, and margins however you want.)
<table>
<tr>
<td colspan=4 background="url goes here" height=500>
</td>
</tr>
<tr>
<td>
<div style="border: 0px none ; overflow: auto; float: left; margin-left: 10px; margin-right: 5px; width: 325px; height: 320px;">text here
</div>
</td>
<td>
<div style="border: 0px none ; overflow: auto; float: left; margin-left: 10px; margin-right: 5px; width: 325px; height: 320px;">text here
</div>
</td>
<td>
<div style="border: 0px none ; overflow: auto; float: left; margin-left: 10px; margin-right: 5px; width: 325px; height: 320px;">text here
</div>
</td>
<td>
<div style="border: 0px none ; overflow: auto; float: left; margin-left: 10px; margin-right: 5px; width: 325px; height: 320px;">text here
</div>
</td>
</tr>
<tr>
<td>
<div style="border: 0px none ; overflow: auto; float: left; margin-left: 10px; margin-right: 5px; width: 325px; height: 320px;">text here
</div>
</td>
<td>
<div style="border: 0px none ; overflow: auto; float: left; margin-left: 10px; margin-right: 5px; width: 325px; height: 320px;">text here
</div>
</td>
<td>
<div style="border: 0px none ; overflow: auto; float: left; margin-left: 10px; margin-right: 5px; width: 325px; height: 320px;">text here
</div>
</td>
<td>
<div style="border: 0px none ; overflow: auto; float: left; margin-left: 10px; margin-right: 5px; width: 325px; height: 320px;">text here
</div>
</td>
</tr>
<tr>
<td colspan=4>text here
</td>
</tr>
</table>
Now lets define the width of the entire table and then the width of the columns.
Make sure the columns add up to the total amount. You can also use %, but its harder to make the scrolltables work.
With the scrolltables, add the left and right margins and subtract them from the total column width. that is what you place in the "div" tag.
<table width=800>
<tr>
<td colspan=4 background="url goes here" height=500>
</td>
</tr>
<tr>
<td width=200>
<div style="border: 0px none ; overflow: auto; float: left; margin-left: 10px; margin-right: 5px; width: 185px; height: 320px;">text here
</div>
</td>
<td width=200>
<div style="border: 0px none ; overflow: auto; float: left; margin-left: 10px; margin-right: 5px; width: 185px; height: 320px;">text here
</div>
</td>
<td width=200>
<div style="border: 0px none ; overflow: auto; float: left; margin-left: 10px; margin-right: 5px; width: 185px; height: 320px;">text here
</div>
</td>
<td width=200>
<div style="border: 0px none ; overflow: auto; float: left; margin-left: 10px; margin-right: 5px; width: 185px; height: 320px;">text here
</div>
</td>
</tr>
<tr>
<td width=200>
<div style="border: 0px none ; overflow: auto; float: left; margin-left: 10px; margin-right: 5px; width: 185px; height: 320px;">text here
</div>
</td>
<td width=200>
<div style="border: 0px none ; overflow: auto; float: left; margin-left: 10px; margin-right: 5px; width: 185px; height: 320px;">text here
</div>
</td>
<td width=200>
<div style="border: 0px none ; overflow: auto; float: left; margin-left: 10px; margin-right: 5px; width: 185px; height: 320px;">text here
</div>
</td>
<td width=200>
<div style="border: 0px none ; overflow: auto; float: left; margin-left: 10px; margin-right: 5px; width: 185px; height: 320px;">text here
</div>
</td>
</tr>
<tr>
<td colspan=4>text here
</td>
</tr>
</table>
Now lets define the rest of the table and the bottom cell. Lets also define the color of each cell.
table align-->tells you where the table will be on the page
table bgcolor--> the background of the entire table
table border--> how many pixels will the border be (you can put 0 to not have a border)
table bordercolor--> The color of your border
table cellpadding--> sets the amount of space (both horizontal and vertical) between the cell wall and the contents
table cellspacing--> sets the amount of space between the cells of a table.
<table align=center width=800 bgcolor=#FFFFFF border=2 bordercolor=#000000 cellpadding=3 cellspacing=3>
<tr>
<td colspan=4 background="url goes here" height=500>
</td>
</tr>
<tr>
<td width=200 bgcolor=#000000>
<div style="border: 0px none ; overflow: auto; float: left; margin-left: 10px; margin-right: 5px; width: 185px; height: 320px;">text here
</div>
</td>
<td width=200 bgcolor=#404040>
<div style="border: 0px none ; overflow: auto; float: left; margin-left: 10px; margin-right: 5px; width: 185px; height: 320px;">text here
</div>
</td>
<td width=200 bgcolor=#C0C0C0>
<div style="border: 0px none ; overflow: auto; float: left; margin-left: 10px; margin-right: 5px; width: 185px; height: 320px;">text here
</div>
</td>
<td width=200 bgcolor=#ffffff>
<div style="border: 0px none ; overflow: auto; float: left; margin-left: 10px; margin-right: 5px; width: 185px; height: 320px;">text here
</div>
</td>
</tr>
<tr>
<td width=200 bgcolor=#000000>
<div style="border: 0px none ; overflow: auto; float: left; margin-left: 10px; margin-right: 5px; width: 185px; height: 320px;">text here
</div>
</td>
<td width=200 bgcolor=#404040>
<div style="border: 0px none ; overflow: auto; float: left; margin-left: 10px; margin-right: 5px; width: 185px; height: 320px;">text here
</div>
</td>
<td width=200 bgcolor=#C0C0C0>
<div style="border: 0px none ; overflow: auto; float: left; margin-left: 10px; margin-right: 5px; width: 185px; height: 320px;">text here
</div>
</td>
<td width=200 bgcolor=#ffffff>
<div style="border: 0px none ; overflow: auto; float: left; margin-left: 10px; margin-right: 5px; width: 185px; height: 320px;">text here
</div>
</td>
</tr>
<tr>
<td colspan=4 width=800 bgcolor=#808080>text here
</td>
</tr>
</table>
And that completes the basic layout.
If you have any questions, please PM me on Howrse.
Now go to your profile on Howrse, click on "HTML mode", and copy-paste the code you have created.
NOTE: Always edit text in Normal mode. Howrse will add the font HTML. I repeat: ALWAYS EDIT THE TEXT IN NORMAL MODE!!!